Muppet Car
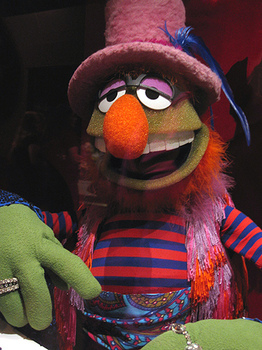 Dr. Teeth, leader of Electric Mayhem
Back in 2009, I got it into my head to make a Hallowe'en costume for our car. A local mom group (Baltimore Mommies!) was hosting a "Trunk or Treat" event where a bunch of us would decorate our cars and the kids would trick-or-treat from trunk to trunk. There were games and costumes and crafts - it's a great way to have a really safe Hallowe'en for little ones.
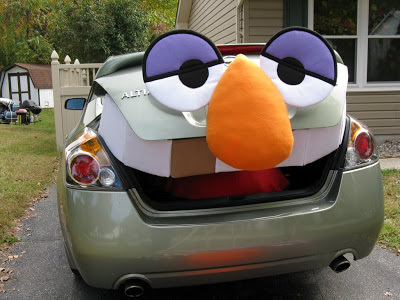
But I wasn't satisfied with simply decorating our trunk with a theme. I wanted to go big. I stared at our green Nissan Altima. And stared. Until I thought that the back end with the trunk open kind of looked like a mouth. Add some teeth and you could do a shark, maybe? Might be scary for the little kids. So I Googled "things with teeth" and found an old friend. If you have no idea who this guy is, go watch some Muppets. And get off my lawn!
But I wasn't satisfied with simply decorating our trunk with a theme. I wanted to go big. I stared at our green Nissan Altima. And stared. Until I thought that the back end with the trunk open kind of looked like a mouth. Add some teeth and you could do a shark, maybe? Might be scary for the little kids. So I Googled "things with teeth" and found an old friend. If you have no idea who this guy is, go watch some Muppets. And get off my lawn!
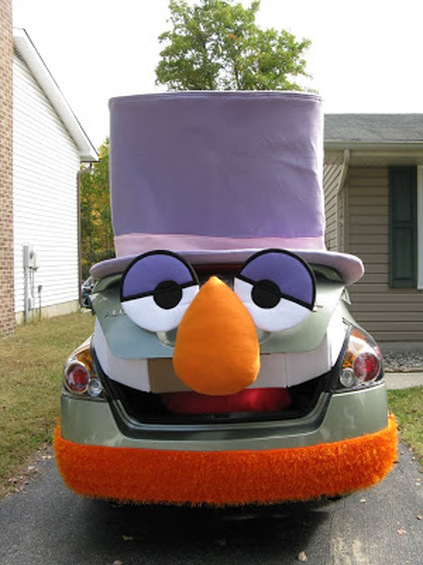
You know how the ladies at the fabric counter will make small talk and ask you what you're making while they cut your fabric? Try explaining a giant fuzzy purple pimp hat for your car. It's entertainment at its best.
|
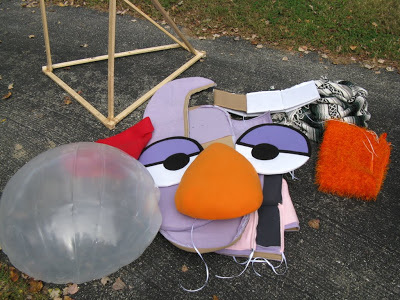
Most of the pieces are fleece or felt covers over sections of reinforced cardboard.
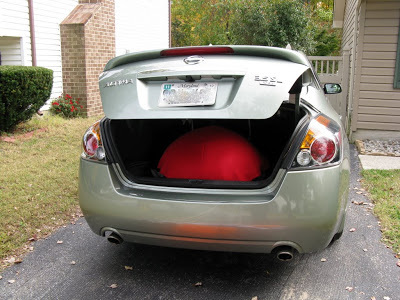
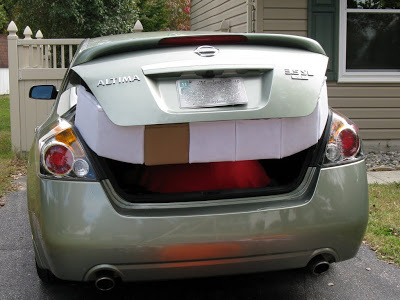
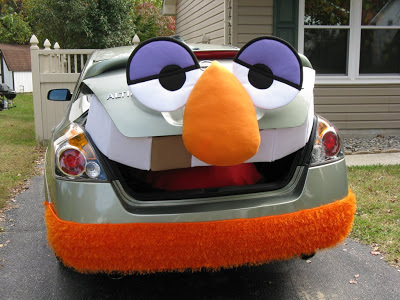
I'd been digging around in our storage area and found a big plastic bladder that the previous owners of our house must have left behind. It was some sort of inflatable furniture thing from IKEA, I think. I covered the bladder in red fabric to make a tongue. The teeth are squares of cardboard with layers of quilt padding and white felt covering them. I found some gold lining for his trademark tooth. To attach the teeth, I straightened out a coat hanger and sewed it to the back of the teeth, and then curved it into the right shape to fit the trunk. Ribbons at either end tied to the trunk's hinge arms. At the center is a wire loop that fits into the trunk's latch. If I hit the trunk button, his teeth fall out. The eyes and nose are more cardboard, felt, and fleece. Amazing what you can do with a sewing machine and sheer determination. The nose is stuffed with an old towel, and padded with more quilting. A wooden dowel sewn onto the back gives it some support, and something to tie the ribbons to that loop through our license plate to secure it. I liked how the rear lights started to look like rosy cheeks :) Remember the 70s and the 80s when you couldn't go into a fabric store without seeing at least one giant roll of bright orange shaggy fun fur? You'd stare at it and wonder what on earth you would make with that stuff. I finally had a use for it! Dr. Teeth needed a beard. But do you think I could find any of that stuff now? It seems all the vans in all the land were completely upholstered in the stuff, and there was no more to be found. What I did find though, was some bright orange fun-fur yarn. I crocheted that into a beard and sewed it onto some short fun-fur fabric that I found. |
|
I built a frame for the hat out of scrap bits of wood and laid a blanket over the car so as not to scratch it before assembling the hat on top. The hat wall and brim are attached with lengths of velcro. I wanted to add giant feathers, but ran out of time. In the end, this was one of my favorite projects, just for pure fun!
10/22/2009
